Getting Started

Welcome to 2020!
Hello, I am Yotaro, the developer of 2020.
When you opened this app for the first time, you might have been overwhelmed by the density of the GUI. That’s because I’m a “bit” of a maximalist, and I’ve crammed a lot of modules into a single window.
You will need some time to master this app. A bit of sound design knowledge will also help you get the beats you want. First, learn the basics of the GUI. Then get familiar with where each module is and what kind of sound each one makes. Once you have a mental map of the modules, you’ll be much better at exploring new sounds.
Even I, the developer, discover a new sound every time I open 2020.
If you discover any great sounds or tips, share them with us using the hashtag #2020beatmachine.
Also check out the tips videos on my YouTube channel.
And join the 2020 user community on Discord!
I hope you enjoy the adventure that awaits you!
Triggering your first kick sound
Triggering manually

Focus on the module 1-1 (labeled Z) in GRP1. Click on the rectangle in the upper right corner of the module to play the kick sound.
Triggering by sequencer

The bottom line of SEQ1 corresponds to 1-1. Click or drag the sequence editor to edit the sequence, then press the space key to play the sequence.
 Hold down the Shift key and drag to adjust the volume, and hold down the Command key and click or drag to set accents.
 Sequence resolution can be set for each beat.
See also Grid Sequencer.
Making your beats
Load up a sound file
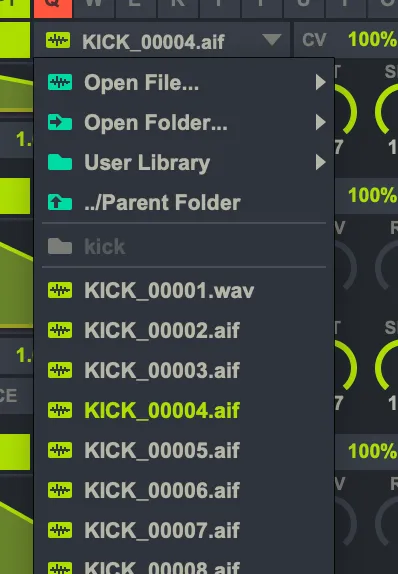
Click on the File menu to load a sound. You can also load sound files by dragging and dropping them.
See also Sound File Menu.
Making your sound
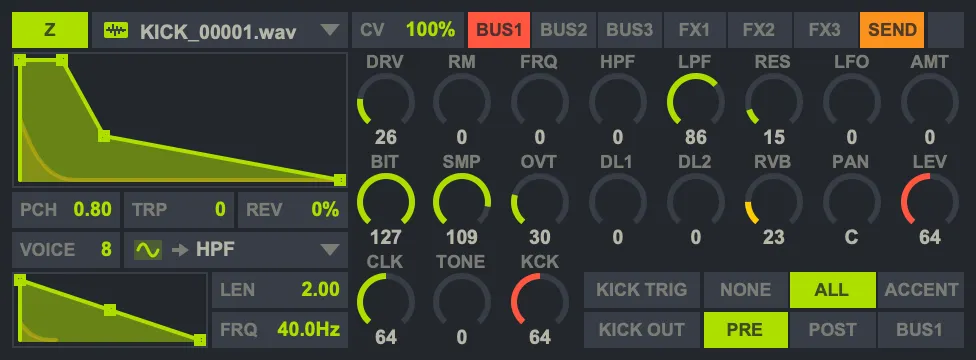
Find your favorite sound by adjusting pitch, envelope, and filter. For example:
- To add a time variation to the pitch, hold down the command key and edit the envelope.
- To get a sweeping sound, adjust the HPF, LPF, and RES.
See also Modules Guide.
Randomizing your beats
Randomizing the sequence

Decreasing the TRIG parameter of SEQ1 decreases the probability of triggering. Increasing the ADD parameter creates additional triggers.
Randomizing parameters
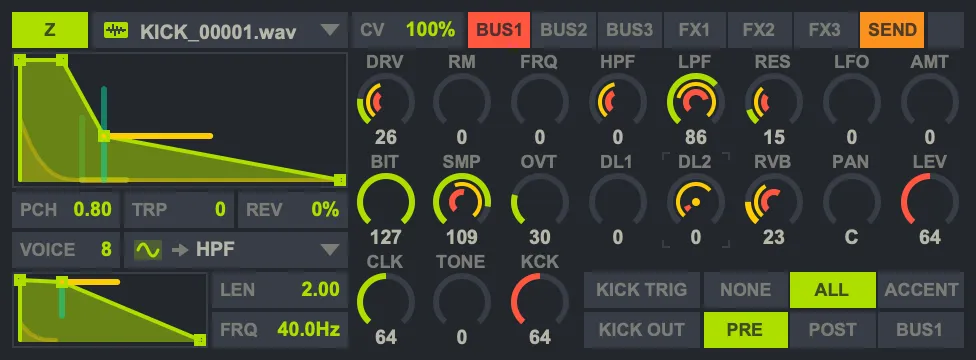
The randomize function creates new sound variations for each trigger. To randomize the envelope, hold down the option key and drag the envelope point. To randomize a knob value, hold down the Option key and drag the knob to adjust the randomization range, or hold down the Command key and drag the knob to adjust the randomization probability.
See also Basic UI components, Envelope.
Working with presets
![]()
Storing presets
- Hold down Shift and press the A key.
- The labels Q and A will be highlighted. This means the current parameters are stored as pattern A in song Q.
- After editing the sequence, hold down Shift and press the S key. The current parameters are now stored as pattern S in song Q.
- After making changes to the sound as well, hold down Shift and press the W key. The current parameters are now stored as pattern A in song W.
Restoring presets
- Press the space key to start playback.
- Press the Q key. The preset selector will enter standby, and the preset will be restored at the beginning of the next bar.
- Also try pressing the W or S key and see how the preset works.
- To restore the preset without waiting for the next bar, hold down the Control key and press W or S.
See also Preset Selector.
Routing your beats
Routing to MIX buses
Route sounds to the mixer by switching BUS1, BUS2, and BUS3 on and off.
Routing to SEND effects
Route sounds to the SEND effect by activating SEND and adjusting the DL1, DL2, and RVB knobs.
Routing to FX buses
Route sounds to the FX module by turning FX1, FX2, and FX3 on and off.
See also Audio Bus.
Building your FX chain
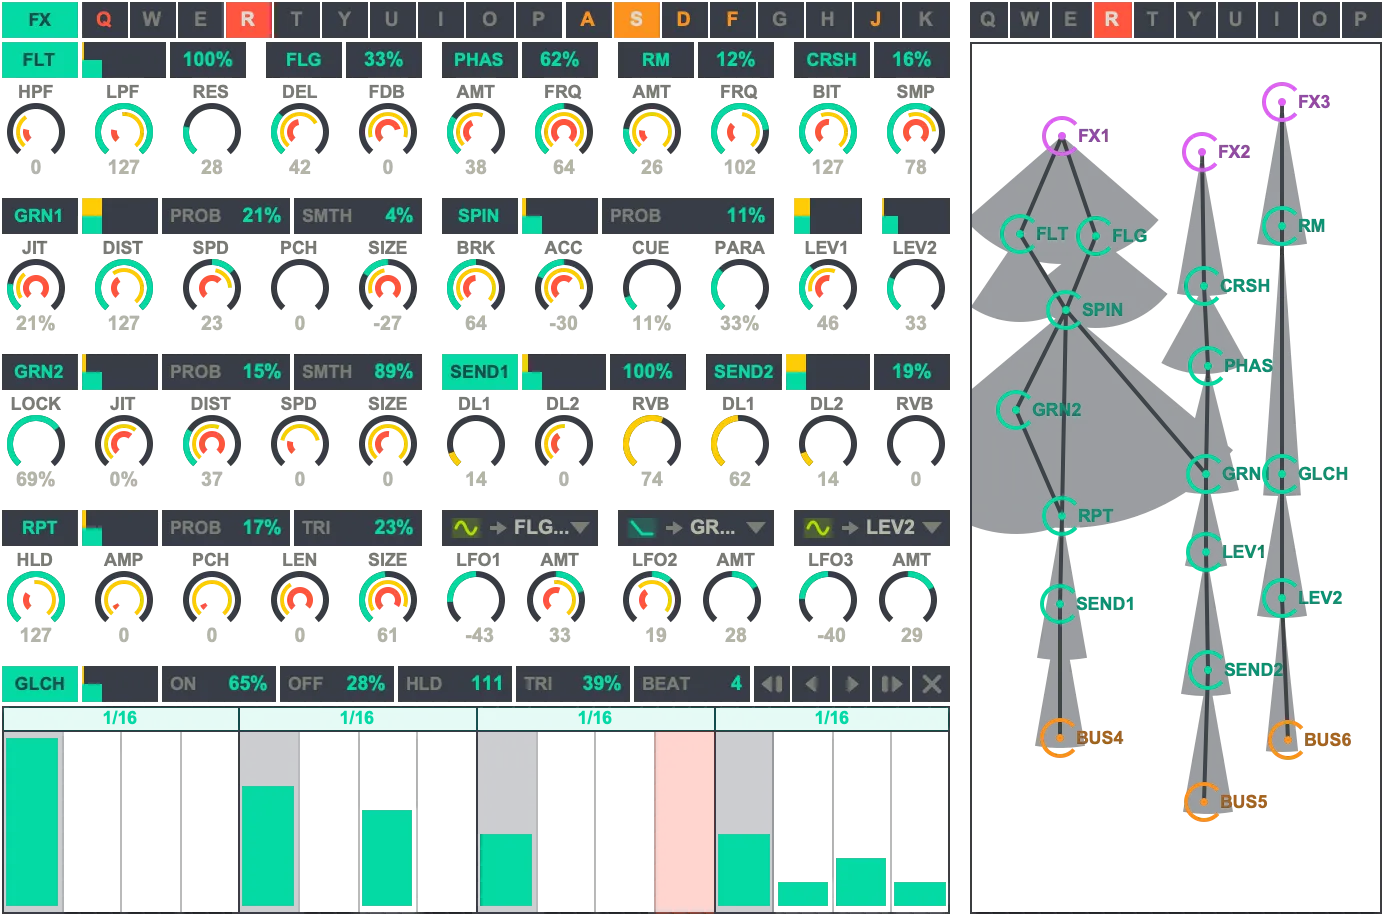
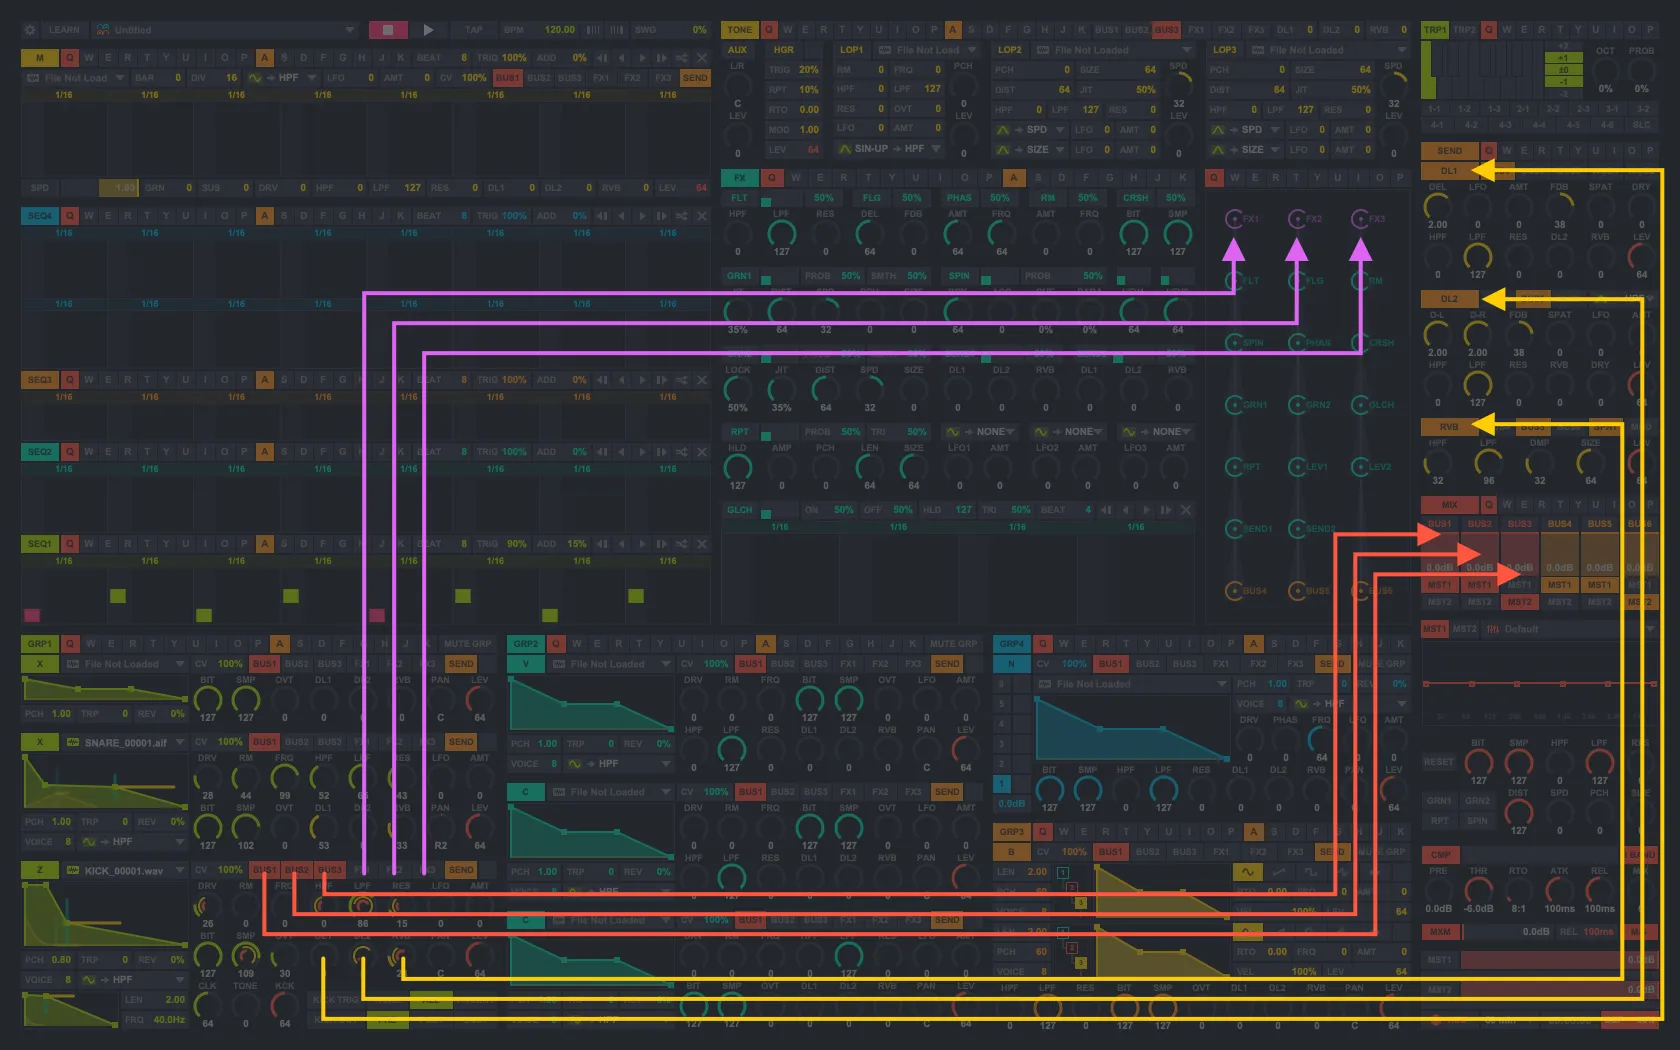
Wiring FX modules
Drag a module in the FX patcher to change its position, then hold down the option key and drag a module to wire it to another module.
See also FX Patcher.
Controlling parameters with trigger events (CV)
For example, when wiring from FX1 to FLT, you will see the yellow CV meter move in response to the trigger sent to FX1. If you set the teal threshold slider higher than the yellow CV meter, the effect parameters will remain unchanged. If you set the teal threshold slider lower than the yellow CV meter, the effect will turn on or off according to the percentage shown in the upper-right corner. Each knob will also be randomized according to its randomization range and probability settings when the CV exceeds the threshold.
See also Trigger Events (CV).
Modulating with LFOs
For example, modulating FLG’s DEL with SIN makes it a flanger, and modulating LEV1 with RMP-UP makes it a ducking effect. You can also randomize the frequency and amount of the LFO.
Saving your project
![]()
Press Command + S to save all presets and all sounds to a single project file.
When sharing your project with friends, simply send them the exported .2020 file.
See also Project.
Recording your beats
![]()
To start recording your beats, just click the REC button. Click the REC button again to end recording.
The recording file format and channel set can be configured in Preferences.
See also Recording Settings.
Opening the default demo project again
The default demo project that is displayed when 2020 is first launched can be opened again from the Help menu.